
This article may contain affiliate links.
Introduction
Electric vehicles are becoming a fixture in driveways across the country—and for good reason. Lower fuel costs, reduced emissions and a smoother driving experience are hard to argue with. But one question catches many new EV owners off guard: How do I charge this thing at home?
The answer isn’t as simple as plugging into the nearest outlet (although that will do the job if you have enough time). Home EV charger installation involves electrical assessments, permit requirements, charger selection and—in some cases—panel upgrades. Getting these decisions right from the start saves time, money and headaches down the road.
In this guide, we’ll walk through everything a homeowner should know before committing to an installation, including:
- The difference between Level 1, Level 2 and Level 3 charging — and which one actually makes sense for your home
- What your electrical panel needs to support a dedicated 240V charging circuit
- Permits, codes, and timelines to expect during the installation process
- Real costs — including the hidden ones most homeowners don’t see coming
Whether your EV is already in the driveway or still on order, planning your home charging setup carefully is one of the smartest investments you can make. A licensed electrician—like the residential specialists at Top Flight Electric serving Polk County, Florida, homeowners—will typically start with a panel assessment before any charger goes on the wall. That first step shapes everything else.
Let’s break it all down.
Understanding EV Charger Types Before You Plan Your Home EV Charger Installation
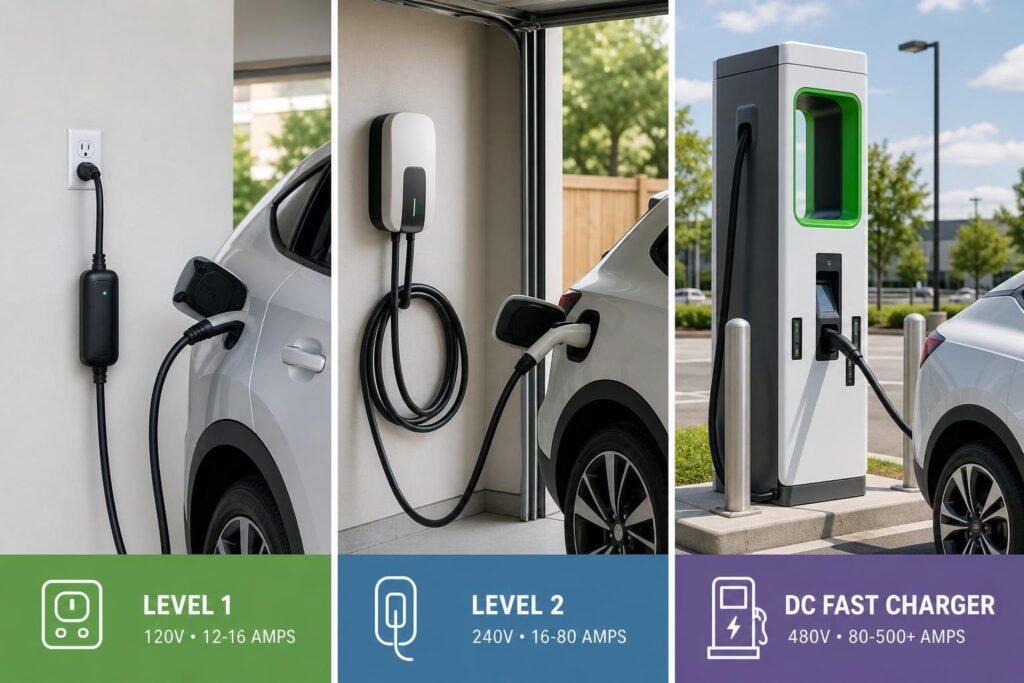
Before scheduling an electrician or purchasing a charger, it helps to understand what you’re actually choosing between. Home EV charger installation planning starts with one fundamental question: which charging level is right for your household? There are three distinct charging levels, each with different voltage requirements, speeds and installation demands. Here’s how they compare at a glance:
| Feature | Level 1 | Level 2 | Level 3 (DC Fast) |
| Voltage | 120V (standard outlet) | 240V (dedicated circuit) | 480V+ (commercial) |
| Charging Speed | ~1.8 kW / 2–3 miles per hour | 7.2–12 kW / 10–35 miles per hour | Delivers 80% charge in 30–60 minutes |
| Cost Profile | Lowest when a suitable dedicated outlet already exists | Varies with charger choice, wiring distance, panel capacity, labor, and permits | Substantially higher commercial equipment and infrastructure costs |
| Plug Standard | Standard 120V household | J1772 or NACS | Varies by network |
| Best For | Short daily trips, overnight charging | Most homeowners; longer commutes | Commercial locations, high turnover |
| ENERGY STAR Certified Options | Limited | Yes | Yes |
For the vast majority of homeowners, the decision comes down to Level 1 or Level 2. Level 3 DC Fast Chargers are designed for commercial environments with high vehicle turnover—the cost and electrical infrastructure required make them impractical for residential use.
Level 1 Charging: When It’s Enough
Level 1 charging is exactly what it sounds like: plug your vehicle into a standard 120V household outlet and let it charge. Most EVs come with a Level 1 cordset right out of the box, meaning there’s no installation cost and no electrician required—provided you have a dedicated branch circuit available near your parking spot.
The trade-off is speed. At roughly 1.8 kW, a Level 1 charger adds only about 2–3 miles of range per hour. For a homeowner who drives 20–30 miles a day and plugs in every night, that math works out just fine. An overnight charge of 8–10 hours can replenish 20–30 miles of range, which covers most daily commutes.
Where Level 1 falls short is for drivers with longer commutes, larger battery packs or irregular schedules. If your EV has a 300-mile battery and you regularly drive 80-100 miles a day, Level 1 charging simply can’t keep up. That’s where Level 2 becomes the practical choice.
Level 2 Charging: The Most Practical Home Upgrade
Level 2 charging runs on a dedicated 240V circuit—the same voltage used by large appliances like electric dryers and ranges. With output ranging from 7.2 kW to 12 kW, depending on your home’s capacity and the charger you select, a Level 2 setup can deliver 10 to 35 miles of range per hour of charging. Most EV owners can start the day with a full battery after just a few hours plugged in overnight.
Installing a Level 2 charger requires a licensed electrician to run a dedicated circuit from your electrical panel to the charger location, size the breaker correctly and verify that your panel has the available capacity to handle the additional load. This isn’t a DIY project—proper panel load calculations and code-compliant wiring are essential for both safety and long-term reliability.
For most households, Level 2 is the sweet spot: fast enough to meet daily needs, practical enough for home installation and affordable enough to justify the upfront cost.
What Your Home’s Electrical System Needs to Support a Level 2 Charger
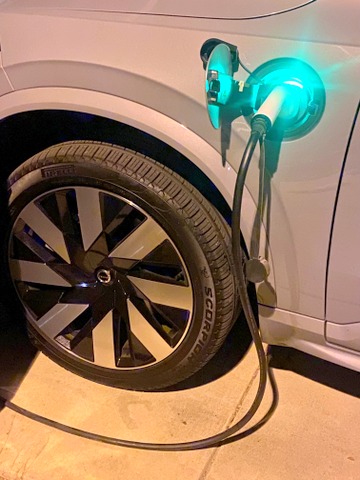
Once you’ve decided on Level 2 charging, the next step is understanding whether your home’s electrical system can support it—and what upgrades, if any, are needed before the charger goes on the wall. This is where a professional assessment becomes essential.
Panel Capacity and Load Calculations
Every home has a service capacity—typically measured in amps—that limits how much electrical load it can handle at once. A Level 2 EV charger is classified as a continuous load under the National Electrical Code (NEC), meaning it draws power steadily for extended periods. That distinction matters when sizing the circuit.
Before installation, a licensed electrician will perform a panel load calculation: an assessment of your home’s existing electrical demand compared to its total available capacity. The goal is to determine whether there’s enough headroom to add a dedicated 240V circuit for the charger without overloading the system.
Key factors in this assessment include:
- Available capacity in the existing panel (measured in amps)
- Current electrical load from HVAC systems, appliances and other circuits
- Breaker sizing for the new EV charger circuit (typically 40–60 amps for most Level 2 chargers)
- Conduit routing from the panel to the charger location
- Future-proofing — if you plan to add more EVs or electrify other appliances, sizing the conduit and switchgear for future capacity now can save significant cost later
If your home has adequate capacity, the installation is relatively straightforward: a new dedicated branch circuit, proper wiring and the charger itself. If capacity is tight, a panel upgrade may be necessary before the charger can be safely installed.
When a Panel Upgrade Is Required
Older homes — particularly those built in the 1960s, 70s, and 80s — were designed for electrical loads that look nothing like what modern households demand. A home that was wired for a single-car family with a few appliances may now be running dual HVAC systems, a home office, multiple large-screen TVs and a growing list of smart devices. Adding an EV charger on top of that can push an aging panel past its limits.
Signs that a panel upgrade may be needed before EV charger installation include:
- A panel rated at 100 amps or less (most modern homes benefit from 200-amp service)
- Frequently tripping breakers even before the charger is added
- Outdated wiring that doesn’t meet current code standards
- A panel that’s already at or near full capacity with no open slots
In Florida, for example, the combination of aging housing stock, high electrical demand from air conditioning and the added load of EV charging makes panel assessments particularly important. Residential electrical specialists familiar with local conditions and local electrical code—such as the team at Top Flight Electric, which focuses exclusively on Polk County homes—are well-positioned to identify whether a panel right-size is needed before any charger installation begins. Getting that assessment done first prevents the frustrating and costly scenario of installing a charger only to discover the panel can’t safely support it.
Permits, Codes and the Home EV Charger Installation Planning Process
One of the most commonly overlooked aspects of home EV charger installation planning is the permitting process. It’s not glamorous, but skipping it—or working with a contractor who does—can create serious problems down the line, from failed inspections to voided homeowner’s insurance coverage.
Why Permits Matter and What to Expect
EV charging infrastructure is treated as a continuous load under the National Electrical Code, and NEC Article 625 contains the primary requirements governing EV charging equipment installation. Beyond the NEC, local jurisdictions often have their own permitting requirements layered on top.
In practical terms, this means:
- A permit application must typically be submitted to your local building authority before installation begins
- A site installation plan may need to be reviewed and approved before work starts
- An inspection is usually required after installation to verify code compliance
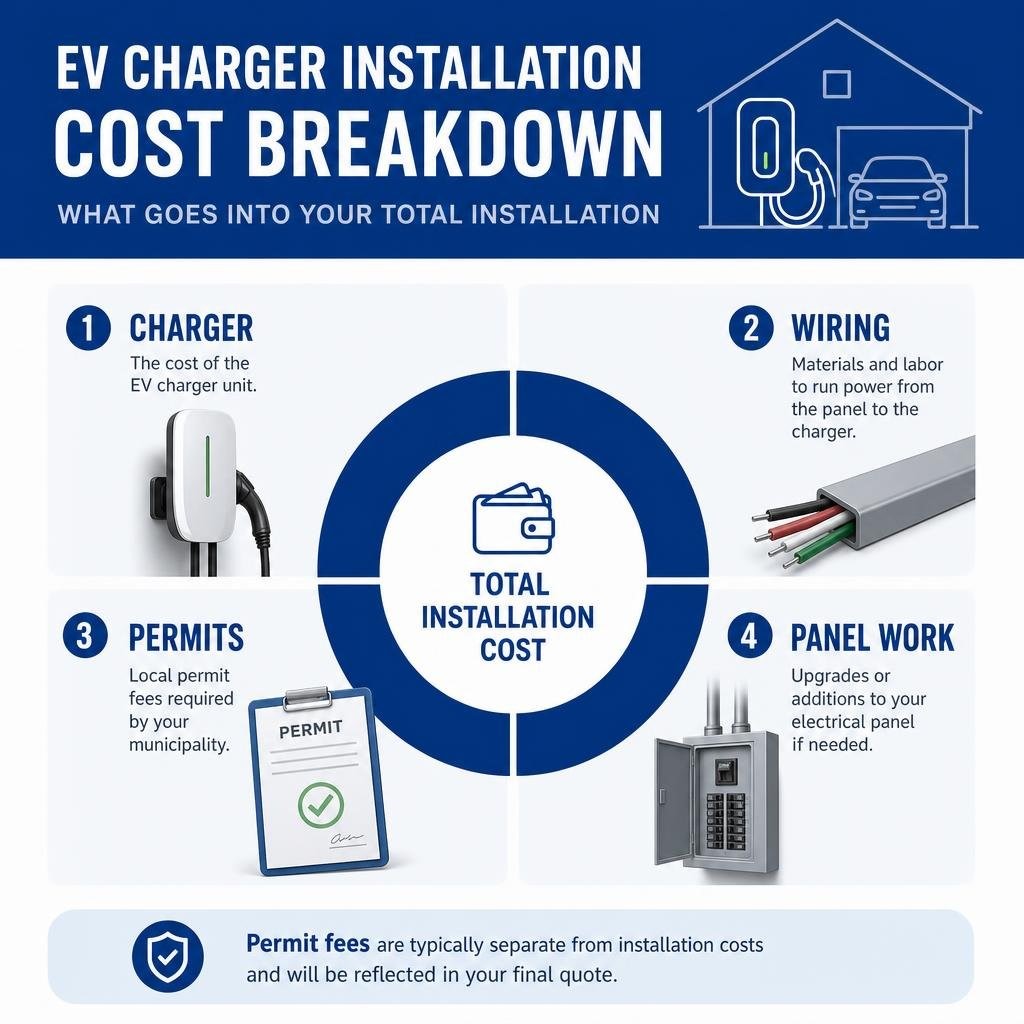
- Permit fees are typically separate from installation costs and will be reflected in your final quote
The end-to-end timeline from initial assessment to completed installation can range from several days to several weeks, depending on local permitting, utility involvement, equipment availability and the complexity of the job. Projects that require a service or panel upgrade can take longer. Working with a licensed electrician who handles permit submission as part of the installation process is strongly recommended; it helps ensure the paperwork is completed correctly and the installation complies with applicable requirements.
Safety certification of the equipment itself also matters. Choosing Energy Star-certified chargers that have been tested by a nationally recognized testing laboratory adds an additional layer of assurance that the equipment meets established safety standards.
Choosing the Right Installation Location
Where you install your charger has a direct impact on installation cost, cord length requirements, and long-term convenience. A few key considerations:
Garage vs. Outdoor Installation Most homeowners install Level 2 chargers inside an attached garage, which simplifies wiring runs and protects the equipment from weather. Outdoor installation is also safe and practical—but requires outdoor-rated, weatherproof equipment. Rain and humidity are not a concern as long as the charger is rated for exterior use.
Distance from the Electrical Panel The farther the charger location is from your home’s main panel, the longer the wiring run—and the higher the installation cost. Keeping the charger as close to the panel as practical reduces material costs and labor time. Charging cord lengths typically range from 12 to 25 feet, so factor in the distance between the charger mounting point and where your vehicle will be parked.
Detached Garages If your garage is detached from the main house, underground conduit will need to be trenched between the structures to run power to the charger. This adds meaningful cost to the project and should be factored into your budget from the start.
Mounting Height and Accessibility The charger should be mounted at a height and location that makes plugging in easy and keeps the cord off the floor when not in use. Your electrician can advise on optimal placement based on your vehicle’s charge port location.
Charger Features, Costs, and What Installation Actually Includes
With the electrical groundwork understood, it’s time to think about the charger itself—what features matter, what the installation actually covers, and where the budget surprises tend to show up.
What a Professional Installation Typically Covers
A complete, professional Level 2 EV charger installation generally includes the following:
- Panel load calculation to confirm available capacity before any work begins
- Provision and installation of code-compliant wiring and protective conduit tubing from the panel to the charger location
- Installation of a properly sized breaker in the electrical panel dedicated to the EV charger circuit
- Mounting the charger at the selected location
- Startup and testing to verify the charger is operating correctly and safely
- Permit document preparation and submission to the local jurisdiction (where required)
- Labor warranty covering the installation work
What’s typically not included in a standard installation quote: the charger itself (you’ll usually need to purchase this separately or confirm it’s included), drywall or stucco repairs if walls need to be opened for wiring runs, and trenching costs for detached garage installations. Permit fees are often listed as a separate line item in the final quote rather than bundled into the base installation price.
When comparing quotes, make sure you’re comparing apples to apples—a lower base price that excludes permit fees, panel work or materials may end up costing more overall.
Hidden Costs Homeowners Often Overlook
A few budget items that frequently catch homeowners off guard:
Drywall and Wall Repairs If wiring needs to be run through finished walls or ceilings, those surfaces may need to be cut open and repaired afterward. This work is typically not included in a standard electrical installation quote.
Trenching for Detached Garages Running underground conduit to a detached structure requires excavation. Depending on the distance and whether the trench crosses pavement, this can add several hundred to several thousand dollars to the project.
Permit Fees Permit costs vary by jurisdiction and are often passed through to the homeowner as a separate expense. Ask your electrician upfront what permits will be required and what those fees are estimated to be.
Panel Upgrade Costs If your panel assessment reveals insufficient capacity, a panel upgrade will need to happen before the charger can be installed. This is a separate project with its own cost—though it’s one that adds long-term value to your home and future-proofs it for additional electrification.
Networked Charger Data Fees Smart chargers with cellular connectivity for remote monitoring and payment processing typically carry a monthly or annual data fee. Wi-Fi-connected chargers avoid this recurring cost but require a reliable signal in the installation area.
Frequently Asked Questions About Home EV Charger Installation Planning
Do I need to upgrade my electrical panel before installing a Level 2 charger?
Not always—but it depends on your panel’s current capacity and existing load. A licensed electrician will perform a load calculation to determine whether your panel has enough available headroom to support a dedicated 240V EV charger circuit. Homes with 200-amp service and moderate existing loads often have sufficient capacity without any panel work. Older homes with 100-amp panels or homes already running near capacity are more likely to need an upgrade. The assessment comes first; the answer follows from that.
How long does the home EV charger installation process take from start to finish?
From initial assessment to completed installation, the timeline can range from several days to several weeks when permits are required. The assessment and quote may happen quickly, while permitting, utility coordination, panel work or a service upgrade can extend the schedule. Once approvals and any prerequisite electrical work are complete, the charger installation itself is often comparatively quick.
Can I install an EV charger outdoors or in a detached garage?
Yes to both—with important caveats. Outdoor installations require equipment that is specifically rated for exterior use and weatherproof conditions. Rain is not a safety concern for properly rated outdoor chargers, but the equipment must carry the appropriate certification for outdoor installation. Detached garages require underground conduit to be trenched from the main house or a separate electrical service—this adds cost and should be planned for in your budget from the beginning. Your electrician will assess the conduit run distance and any obstacles (pavement, landscaping) that affect the scope and cost of the work.
Conclusion
Installing a Level 2 EV charger at home is one of the most practical upgrades an EV owner can make—but it’s a project that rewards careful planning far more than it rewards speed. The homeowners who end up most satisfied are the ones who took the time to understand their electrical system before committing to a charger, worked with a licensed electrician who handled permits properly and budgeted realistically for the full scope of the project rather than just the charger itself.
The core steps are straightforward: start with a panel assessment to understand your home’s capacity, choose a charger that fits your vehicle and your daily driving needs, confirm permit requirements with your local jurisdiction, and select an installation location that balances convenience with cost. From there, a qualified electrician handles the technical execution—wiring, breaker sizing, code compliance and testing.
Local conditions can add another layer of consideration. Homeowners in Central Florida, for example, have to deal with Florida’s storm season, aging housing stock and the rapid growth of EV adoption in the region means electrical systems are being asked to do more than ever before. A residential electrical team that understands Florida code and local panel conditions is a meaningful advantage when planning an installation of this kind.
The long-term value of getting this right is significant: a properly installed Level 2 charger adds convenience, supports your vehicle’s battery health and positions your home well for the continued electrification of everyday life. Take the planning seriously, and the installation itself becomes the easy part.
