
This article may contain affiliate links.
Securing a car on a trailer comes down to three things:
- Where the car sits,
- What it is strapped to, and
- How tight the straps are.
Get any of them wrong, and a shifting car can bend a wheel, crack a bumper or make the whole trailer unstable at highway speed.
Here is how to handle each of them, from loading to unloading.
What Should You Check Before Loading?
Start with the numbers. The trailer must be rated for the car’s weight, and the tow vehicle must be rated for the car plus the trailer. An empty open car hauler often weighs 1,500-to-2,500 pounds on its own (enclosed trailers weigh more), so a 4,000-pound car can push the total well past what a midsize SUV is allowed to tow. Electric cars deserve a second look here: battery packs often make them noticeably heavier than a gas car of the same size.
The basic kit is short: four ratchet straps, wheel chocks and gloves. If a strap will touch a sharp frame edge, a painted surface or an alloy wheel, add strap sleeves or edge protectors.
Then inspect the trailer itself: tire pressure, lights, brakes if it has them, the safety chains and the welds on the ramps and tie-down rings. A cracked weld on a D-ring is much easier to deal with in the driveway than on the shoulder. Finally, remove loose items from the car’s cabin and trunk, close the windows, and fold in the mirrors if the trailer has side rails.
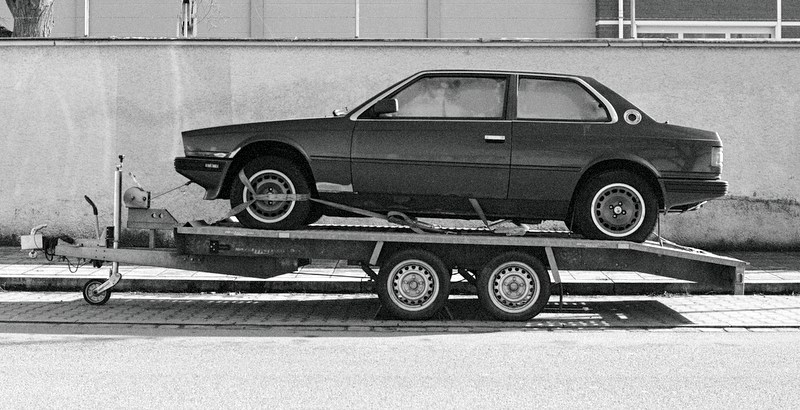
How Do You Get the Car onto the Trailer?
Keep the trailer hitched to the tow vehicle while loading, with the tow vehicle in park, its parking brake set, and ideally its wheels chocked. An unhitched trailer can tip up as the car’s weight passes the axles. Line the car up straight with the ramps before the front wheels touch them, and drive up slowly and steadily rather than in short bursts.
A spotter standing to the side, never directly in front or behind, makes this much easier. They can see wheel alignment on the ramps and warn about bumper contact that the driver cannot see. For lowered cars, a couple of wooden boards under the ramp ends reduce the approach angle and can save a front lip.
A car that does not run should be pulled on with a winch, not pushed by hand. Leave the ignition in the position that unlocks the steering, have someone in the driver’s seat to steer and brake, and keep everyone out of the line of the winch cable.
Positioning the Car: Weight Balance Comes First
Position matters more than the straps.
The car’s center of gravity should sit slightly ahead of the trailer axles, which puts some downward pressure on the hitch. For most front-engine cars, that means loading nose first. Mid- and rear-engine cars may need to sit further forward or go on backward.
If the weight sits too far back, the trailer can start to sway at highway speed. Too far forward, and the rear of the tow vehicle gets overloaded, which lightens the front wheels and affects steering and braking. A common guideline is that roughly 10 to 15 percent of the total trailer weight should rest on the tongue. The trailer manufacturer’s manual gives the exact range for a specific setup.
Center the car side-to-side as well. An offset of a few inches is hard to see from the driver’s seat, but it often shows up as a constant pull or extra sway once the trailer is moving.
Wheel Straps vs. Frame Straps: Which Is Gentler on the Car?
The choice depends on the car. For most modern vehicles, strapping over the tires or through the wheels is the gentler option. The suspension keeps absorbing bumps during the trip, and the straps hold the tires, which are the parts actually in contact with the trailer deck. Axle or frame tie-downs make more sense for lowered cars, race cars or vehicles where wheel straps do not fit well.
| Method | How it works | Best for |
| Wheel or tire straps | Strap loops over the tire or through the wheel | Most daily drivers and stock vehicles |
| Axle straps | Strap wraps around the axle or a solid suspension part | Vehicles with accessible, solid mounting points |
| Frame hooks | Hook attaches to a designated tie-down slot | Cars with factory tie-down points, project cars |
The owner’s manual often shows where the manufacturer intends the vehicle to be secured, and that information beats any general rule.
Some parts should never carry a strap at all. Tie rods, sway bars, exhaust pipes, brake lines and thin stamped body panels are not designed to carry tie-down loads. When running a strap through a wheel, use a soft loop or wrap the strap in a sleeve so the webbing does not scratch the finish.
Whichever method fits, the goal is four anchor points: two at the front and two at the rear.
Choosing Straps: Working Load Limit Over Breaking Strength
Look at the working load limit (WLL), not the breaking strength printed in large numbers on the package. The WLL describes what the strap is rated to handle in actual use. Breaking strength is typically about three times higher and is never meant to be approached. A strap is only as strong as its weakest part, so the hooks and ratchet must carry the same rating as the webbing.
In the U.S., FMCSA cargo securement rules require the combined WLL of all tie-downs to equal at least half the weight of the cargo. A 4,000-pound car therefore needs a combined WLL of at least 2,000 pounds, and four straps rated at 3,000 pounds each clear that bar with a comfortable margin. Rules for commercial hauling can differ, so check the current regulation if the car is being transported for business.
For passenger cars, 2-inch straps with a sturdy ratchet are the usual choice. People who haul cars regularly often switch to proper flatbed straps, which are built for repeated use and hold up better than thin, low-cost versions. Inspect every strap before use: frayed edges, cuts, sun-faded webbing and bent hooks all mean it should be replaced.
Step-by-Step: Securing the Car
Once the car is in position:
- Put the transmission in park (or in gear for a manual) and set the parking brake. Many haulers leave both engaged for the entire trip, though some classic-car owners follow their own routine. Chock the wheels if the trailer is not completely level.
- Attach the front straps first. Run them from the car’s front anchor points outward and forward to the trailer’s tie-down rings, ideally at about a 45-degree angle.
- Attach the rear straps the same way, angled backward and outward. Some haulers cross the straps for extra side-to-side stability. With crossed straps, make sure they do not rub against each other or against the car.
- Tighten each ratchet gradually, alternating between corners. The car should feel planted, but its suspension should not be pulled down hard.
- Tie off or tuck the loose strap ends. A long tail flapping at highway speed can damage paint or slowly work the ratchet loose.
- Walk around the trailer once more and check every hook, ratchet and strap path before driving off.
The Mistakes Behind Most Damage
Overtightening is the classic mistake, and it feels like the safe choice.
When straps pull the body down until the suspension is compressed, every bump goes straight into the straps and anchor points instead of being absorbed by the springs. Suspension parts and tie-down points can be damaged, and the straps can lose tension once the car shifts slightly.
Sharp edges do their damage more quietly. Road vibration makes webbing rub constantly against bare metal, and a strap can wear through in a single trip.
Some drivers also trust the car’s own brakes and gearbox too much. Park and the parking brake help, but they are a backup. The straps are what actually hold the car in place.

On the Road: Driving and Rechecking
A loaded car hauler changes how the tow vehicle behaves. Stopping distances get noticeably longer, turns need a wider arc so the trailer wheels clear curbs, and crosswinds and passing trucks push the rig more than usual. Many trailer tires are rated for 65 mph, so check the sidewall and keep below that number. If the trailer starts to sway, ease off the accelerator and avoid hard braking or sharp steering.
Straps settle during the first few miles, so a tie-down that felt tight in the driveway can have noticeable slack by the time the trailer reaches the highway. Stop after 10 to 15 miles to retighten and inspect everything. After that, check the straps at every fuel stop or rest break.
A properly secured car should look completely still in the mirror: no movement, no flapping straps, nothing shifting when the trailer hits a bump. If anything looks different from how it looked at the start, pull over and check it right away.
Unloading Without Last-Minute Damage
Park on level ground with the trailer still hitched, and chock the trailer wheels before touching the straps. Release the ratchets one at a time instead of yanking them open, since a strap under tension can snap back hard. Unhook all four corners and move the straps clear of the wheels before starting the car.
Back down the ramps slowly with the steering straight, using the same spotter as during loading. Most unloading damage happens in these last few feet, when the driver is tired and the trip feels finished.
